Change existing crop data or application for fields |

|

|
|
Change existing crop data or application for fields |
|
|
Change existing crop data or application for fields |
|
|
|
Change existing crop data or application for fields |
|
|
|
|
||
If you have selected Change existing crop data or applications for fields in Step 1, then follow these steps to complete the task.
STEP 2: SELECT THE FIELDS YOU'D LIKE TO MODIFY CROPPING DATA FOR
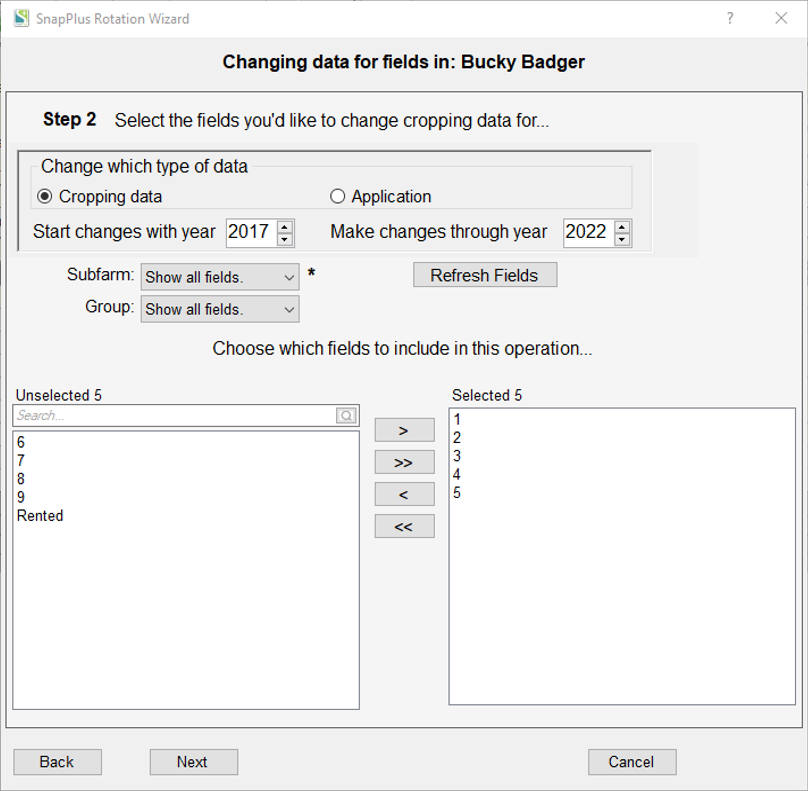
•Choose the fields to include in this operation by selecting field names in the left (unselected) pane of the dual select list and using the arrows to move them to the right (selected) pane. You can limit the fields shown by group or subfarm by using the dropdowns above the field selection area.
•Click Next to go to the next step.
STEP 3: SPECIFY WHAT TO CHANGE
Selecting which years to make changes to:
The change wizard makes changes to the fields you select based on a crop sequence you specify. The wizard only changes data in years that exactly match the crop sequence you have entered. At the top of the Step 3 screen are dropdown lists for selecting crop, prior crop and two years prior crop to specify which years you want to change. For example, if you select a crop in the Crop is dropdown, and leave the prior and two years prior crops as Any, then the change wizard will change data in years you have chosen which match that crop. If you set all three crop dropdowns to Any, then every year in the fields and year range you have specified will get changed.
Before you actually make changes, you can check to see which fields and years will be affected by clicking the button labeled Check for this crop sequence in the fields and years selected.
Choosing what data to change: Cropping data
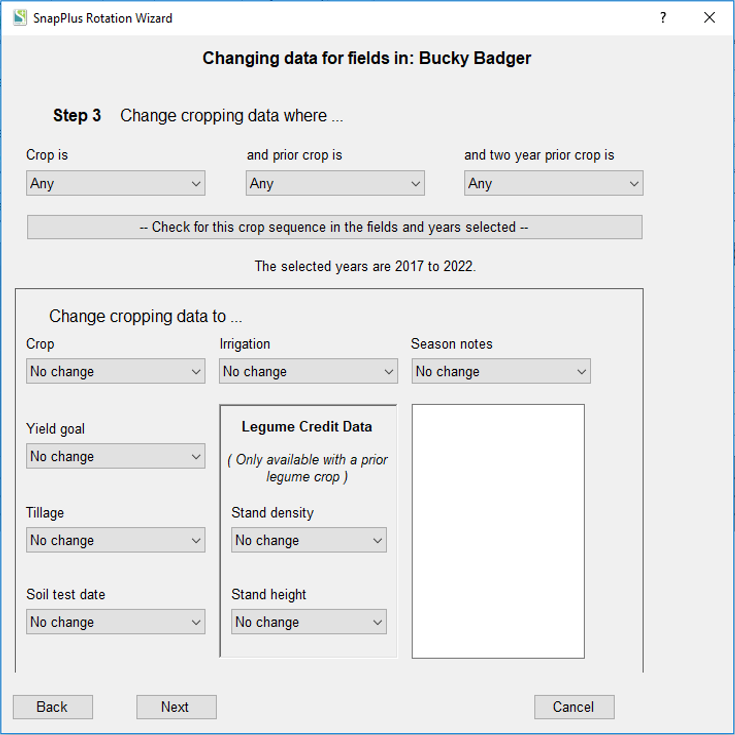
If you have chosen to change cropping data in Step 2, then the lower part of the screen for Step 3 will show a set of dropdown lists for cropping data. Initially, these will all be set to No change indicating no changes will be made. Set only those items you wish to change.
•Crop: This dropdown contains the list of selected crops specified on the farm screen. Selecting a crop will replace the crop you have chosen in the Crop is dropdown list when the crop sequence criteria are met.
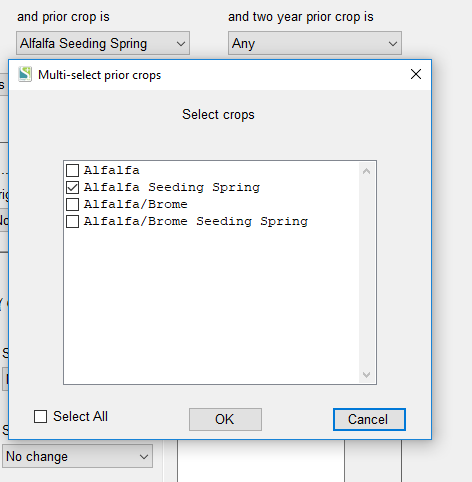
•Prior crops: These dropdowns contain the list of selected crops specified on the farm screen. Selecting a prior crops will add to your crop search sequence criteria. When you select an alfalfa or corn crop, a pop-up dialog will be displayed that will allow you to select multiple crops of the same type.
•Yield Goal: The options in this dropdown depend on the old crop (the one you are changing from, selected in the Crop is dropdown) and the new crop (the one you are changing to, selected in the Crop dropdown). If the new crop is specified, the options will match those for the new crop. If the old crop is specified, then the options will match those for the old crop. This allows for the just the yield goal to be changed for many fields. If both are specified then the the options will match those for the new crop. If neither are specified, then the dropdown will be blank.
•Tillage: The tillage options in this dropdown depend on the old and new crop as explained in the Yield Goal section above.
•Soil test date: Because soil test dates may be different for each field, you cannot pick specific soil test dates to change to. If you wish to make changes, select from either Most recent in year range or Most recent available.
•Irrigation: Pick Irrigated or Not Irrigated to set all cropping years which match the selected crop sequence.
•Legume Credit Data: This control is disabled unless the prior crop is set to one which gives a legume credit. Adjust Stand density and Stand height for all cropping years which match the selected crop sequence.
•Season notes: Choose to either add to or replace current season notes with the text you have typed in. Selecting Replace existing without adding new text will clear existing season notes.
Choosing what data to change: Application data
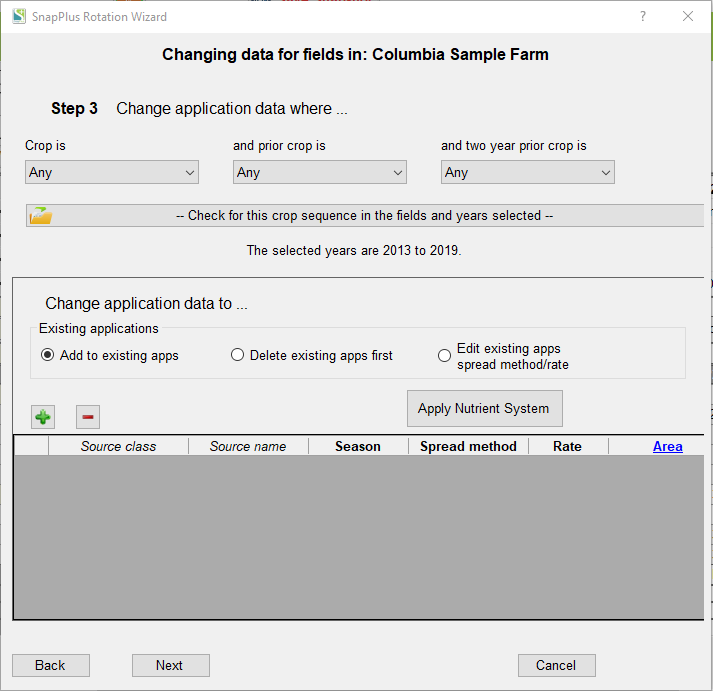
If you have chosen to change nutrient application data in Step 2, you can search for specific criteria using the dropdown menus at the top of the screen.
The lower part of Step 3 will show a table for specifying applications to add to existing cropping years which match the selected crop sequence. There are three choices: Add existing apps, Delete existing apps first or Edit existing app spread method/rate.
To add nutrient applications, the user has two different options. One option is to add them each individually. Another option is to add a Nutrient System. For more information on the Nutrient System Editor please refer to the Nutrient System Editor section.
Option 1: Adding Applications Individually
Then use the ![]() and
and ![]() buttons to set up the applications needed.
buttons to set up the applications needed.
Enter information from left to right for each application you add.
•Nutrient Class: Choose the kind of material to apply from the dropdown list. See Nutrient Application Planner for more information.
•Nutrient Name: Choose a nutrient source from the list of manure or fertilizer sources supplied in the dropdown list.
•Source name: Pick a name from the dropdown list.
•Season: Choose from Fall, Winter, Spring or Summer.
•Spread Method: Make a choice from the dropdown selection. The contents of the dropdown list will vary depending on the type of material selected for application.
•Rate: Type in a rate appropriate to the material you have selected. For solid biosolid applications, units Dry Tons or Cu Yd, clicking on the rate cell will bring up the Biosolid Tons Calculator.
•Area: Select area the of the field, from the dropdown list, for this application. You may also click on the Area in the column header to take you to the spreadable acres help.
Option 2: Adding Applications Through the Nutrient System Editor
You can also add applications by applying a Nutrient System. To do this, click on Apply Nutrient System.
A Select a System to Apply box will appear. Choose the system you would like to add using the dropdown. If you need to create a Nutrient application System, click on Open Nutrient Systems Editor to create a nutrient system.
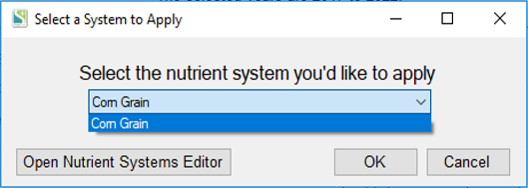
•Click OK. All the nutrients that are a part of the system selected will be added to Step 3 on the Rotation Wizard. For more information on how the Nutrient System Editor works please refer to the section Nutrient System Editor in the Nutrients Tab section.
•Click the Next button to move to the next step.
STEP 4: CONFIRM SETUP
•Confirm setup: A last check on the list of fields to change before changes are made.
•SnapPlus Processing Error Message: After the changes are applied, SnapPlus recalculates the recommendations and other models with the new information. If there are problems running the models, then a dialog box will pop up with information about what went wrong. You can try to fix the individual problems, or, if you have made a snapshot, you can revert to the data you had before running the wizard.