Add crop and application data to fields |

|

|
|
Add crop and application data to fields |
|
|
Add crop and application data to fields |
|
|
|
Add crop and application data to fields |
|
|
|
|
||
If you have selected Add crop and application data to fields in Step 1, then follow these steps to complete this task.
STEP 2: SELECT A ROTATION AND THE FIELDS YOU'D LIKE TO ADD IT TO

•Choose a rotation to apply to the selected fields. If you don't have your desired rotation set up yet, click the Edit Rotations button to set up a new rotation or edit an existing one. This will open the Rotation Editor in a new window.
•Choose the fields to include in this operation by selecting field names in the left (unselected) pane of the dual select list and using the arrows to move them to the right (selected) pane. You can limit the fields shown by group or subfarm by using the dropdowns above the field selection area.
•Click the Next button to move to the next step.
STEP 3: EDIT CROPPING INFORMATION TO BE APPLIED
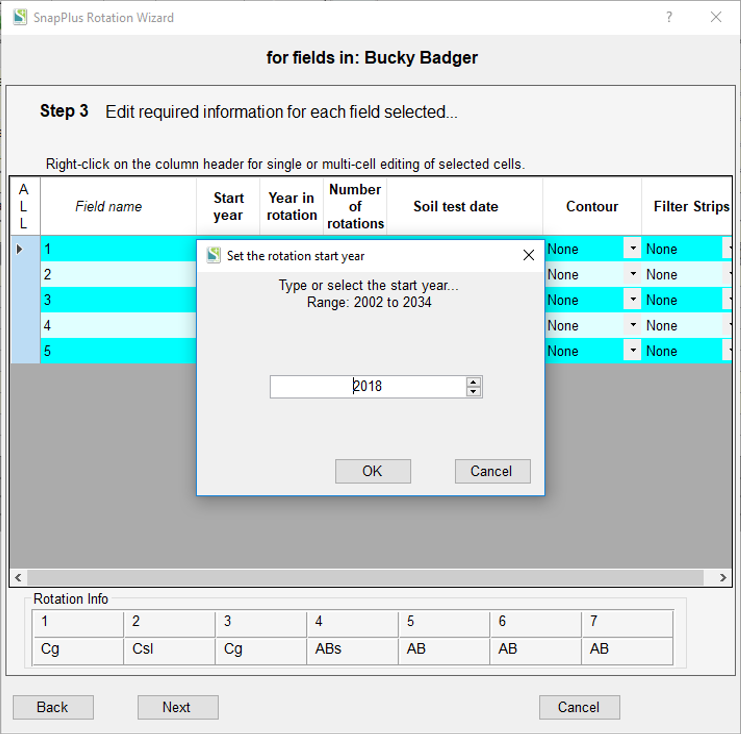
You can edit the information on this screen one cell at a time, or you can change information for multiple cells (For more information on multi-editing tables, see SnapPlus User Interface). You can select rows one at a time, or use the Select (or Unselect) All button at the top of the field name column to select/unselect all rows. Crop abbreviations and rotation year are displayed in the table at the bottom of the screen.
•Confirm field names: If you don't have the correct list of fields you intend to change, then use the Back button to return to Step 2 and reselect the fields.
•Set the Start year (the crop year you want the rotation to start with in each field). Cropping years will be added to fields as necessary, and nutrient sources from the previous year which don't already exist will be copied to each new year created.
•Set the Year in rotation. This is the year in the rotation the field will be in for the start year. The year in rotation can be found in the table at the bottom of the screen. If you start with a year in rotation other than 1, then the program will fill in the first years after entering the last year in rotation, so that the complete rotation will be entered on each field.
•Set the Number of rotations: How many rotations to enter for each field.
•Select the Soil test date using the drop-down menu. The most recent soil test available will be filled in by default.
•Select the type of contouring from the dropdown menu.
•Select the type of filter strips from the dropdown control.
•Click the Next button to move to the next step.
STEP 4: PICK THE NUTRIENT SOURCES THAT MATCH THE NUTRIENT TYPES YOU HAVE SPECIFIED FOR THE ROTATION NUTRIENT APPLICATIONS
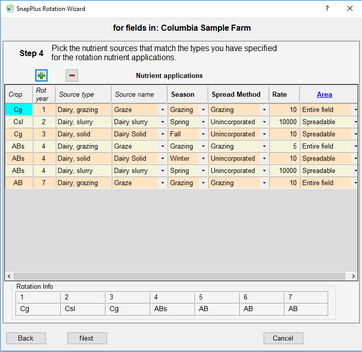
•Edit the Nutrient Applications table. If you added applications for this rotation using the Rotation Editor, then you will see these applications in the table sorted by year in rotation. You can edit the season, spread method and rate.
•For solid biosolid applications, those with units Dry Tons or Cubic Yards, clicking on the rate cell will bring up the Biosolid Tons Calculator.
•You can also use the ![]() or
or ![]() buttons to add or delete applications for this rotation.
buttons to add or delete applications for this rotation.
•Click the Next button to move to the next step.
STEP 5: CONFIRM SETUP
•Confirm setup: A last check on the list of fields to change before changes are made.
•SnapPlus Processing Error Message: After the changes are applied, SnapPlus recalculates the recommendations and other models with the new information. If there are problems running the models, then a dialog box will pop up with information about what went wrong. You can try to fix the individual problems, or, if you have made a snapshot, you can revert to the data you had before running the wizard.