Delete crop and application data for fields |

|

|
|
Delete crop and application data for fields |
|
|
Delete crop and application data for fields |
|
|
|
Delete crop and application data for fields |
|
|
|
|
||
If you have selected Delete crop and application data from fields in Step 1, then follow these steps to complete the task.
STEP 2: SELECT THE FIELDS YOU'D LIKE TO DELETE CROPPING DATA FROM
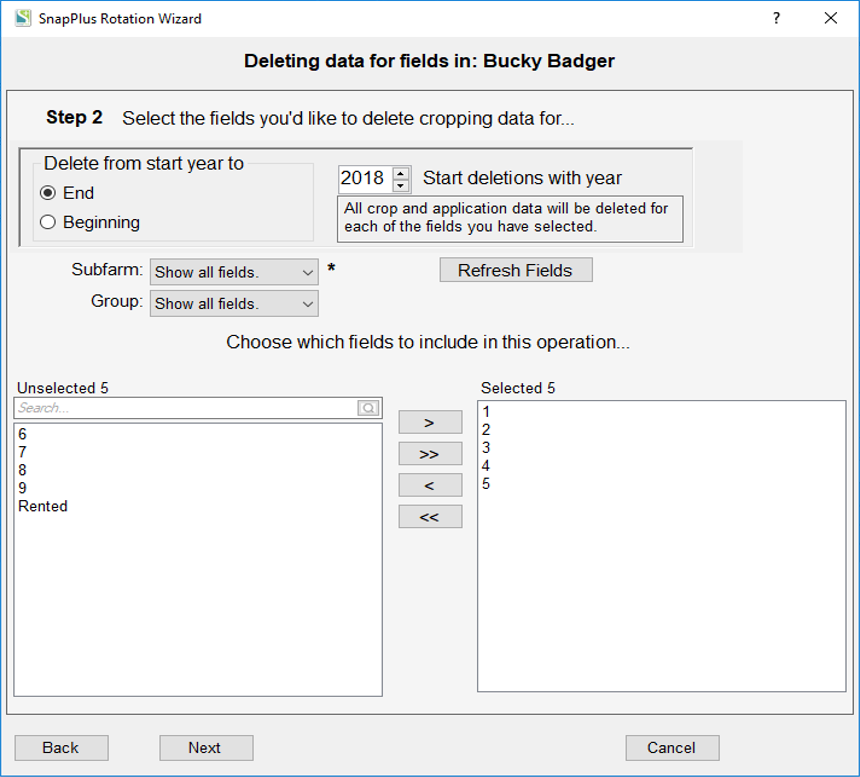
•Select the year that crop year deletions will start with (the deletion will continue through the last year in each of the selected fields)
Note: Deleting a year from all fields will also delete the nutrient and fertilizer sources for that year. If you delete all years from all fields, then all nutrient and fertilizer sources will be lost. To avoid this, leave the years desired in at least one field. If you have taken a snapshot, you can undo deletions by reverting to the snapshot.
•Choose the fields to include in this operation by selecting field names in the left (unselected) pane of the dual select list and using the arrows to move them to the right (selected) pane. You can limit the fields shown by group or subfarm by using the dropdowns above the field selection area.
•Click the Next button to move to the next step.
STEP 3: CONFIRM SETUP
•Confirm setup: A last check on the list of fields to change before doing it.
•SnapPlus Processing Error Message: After the changes are applied, SnapPlus recalculates the recommendations and other models with the new information. If there ares problems running the models, then a dialog box will pop up with information about what went wrong. You can try to fix the individual problems, or, if you have made a snapshot, you can revert to the data you had before running the wizard.