Edit Fields |

|

|
|
Edit Fields |
|
|
Edit Fields |
|
|
|
Edit Fields |
|
|
|
|
||
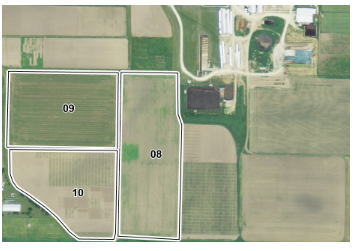
Use the Edit a Field tool to change the geometry or name of a field. Start by navigating to the field you would like to edit. See Map Navigation for more information. Note: Editing is easiest when you have the aerial layer turned on.
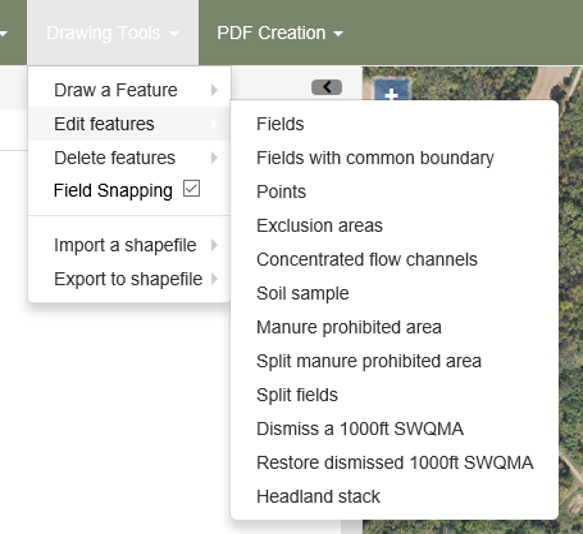
Once you have navigated to the field, click on the Edit a Field button in the Edit features menu under Drawing Tools.
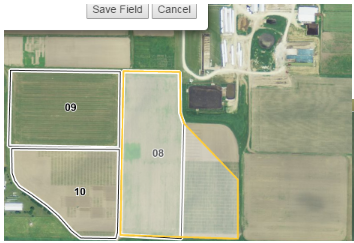
Click inside the boundary of the field you would like to edit. The field will become highlighted in yellow, and one of two dialog boxes will open. Move the yellow line to change the geometry of the shape of the field. You can move the existing vertices by clicking and dragging on the corners, and you can create new vertices by clicking and dragging on the edges. Notice that the black line, designating the old field boundary, remains.

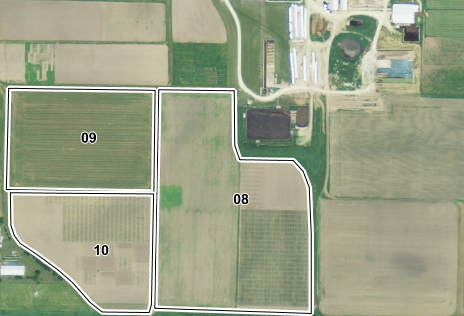
After changes are saved, the yellow line will disappear and the black line will change to match the new boundary.
At the present time, the merging of fields on SnapMaps is not possible. You can merge fields within SnapPlus Desktop. For instructions go to Help> SnapPlus Menu Items > Tools menu. Once you have merged the fields within SnapPlus Desktop you will need to return to SnapMaps to draw your field boundaries for the merged fields.
Please refer to the video tutorial on Editing Field Boundaries in SnapMaps for more information.