Splitting and Merging Fields |

|

|
|
Splitting and Merging Fields |
|
|
Splitting and Merging Fields |
|
|
|
Splitting and Merging Fields |
|
|
|
|
||
Fields should be merged or split first on the desktop (SnapPlus) then uploaded to SnapMaps. SnapPlus will automatically merge geometries for fields when a merge occurs. Below are the steps to split and merge fields.
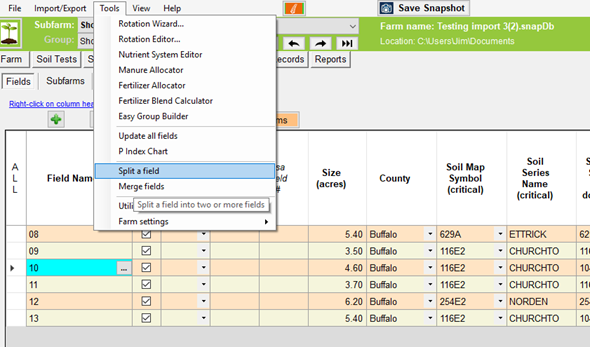
Click on Tools | Split a field
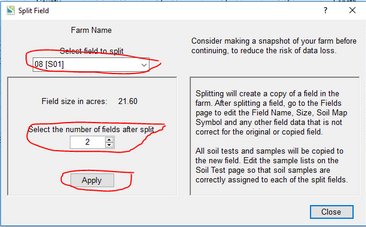
The split field dialog box will appear. Select the field to split in the dropdown and then the number of fields and click apply.
You should now see the new split fields. Notice the new parts are active and the old one is not.
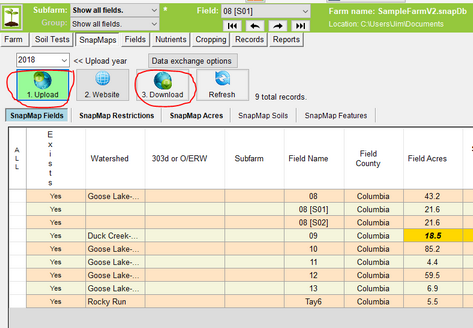
Now, go to SnapMaps to draw the boundaries for these new fields. Click on the SnapMaps tab. Click the download button first to make sure any updates on SnapMaps are downloaded to SnapPlus. Now click upload.
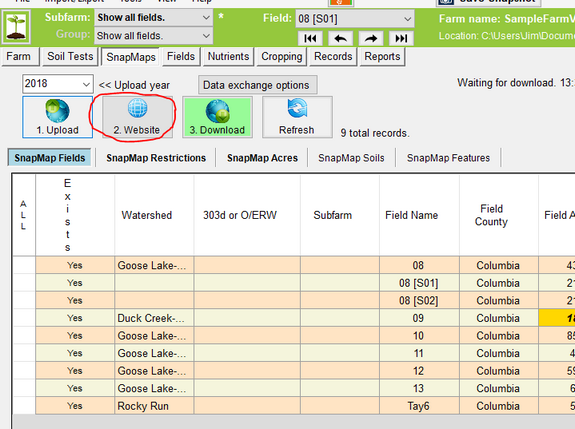
Once the upload finishes click the Website button.
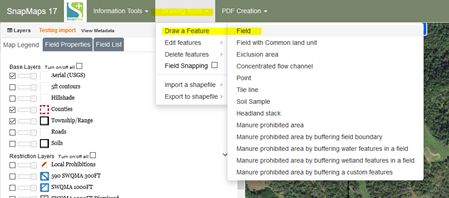
In SnapMaps go to Drawing Tools | Draw a Feature | Field
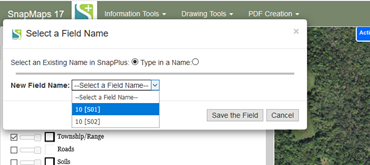
Now click on the map and draw the outline of your first field. Now a dialog box should appear with a dropdown of field names to select. You should see your split fields here. Select the field name you wish to use. Repeat the process for all your new split fields.
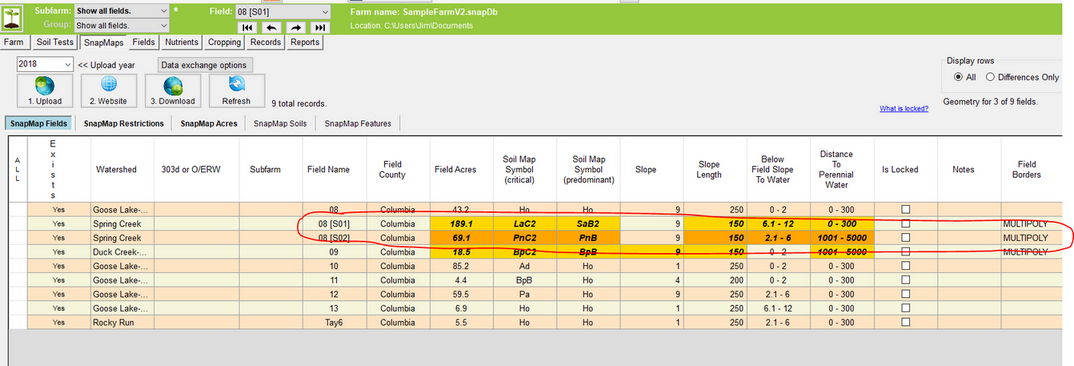
Once you are done drawing your fields go back to SnapPlus and click the download button from the SnapMaps tab. You should see the new split fields with properties from SnapMaps.
Merging fields is a three-step process: 1) Merging in the SnapPlus desktop app, 2) Editing the new geometry in SnapMaps, and 3) Re-imported the merged geometry in SnapPlus desktop.
Merging in SnapPlus Desktop
Click on Tools | Merge fields.

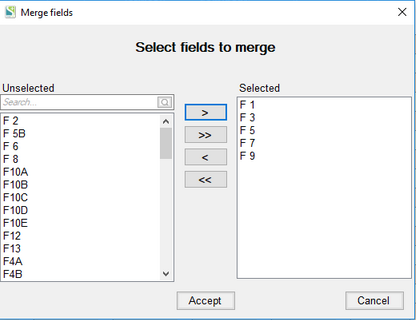
Now the merge fields dialog box should appear. Select the fields you want to merge and click Accept.
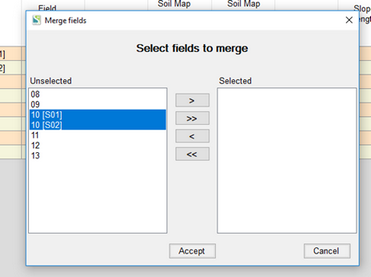
You can merge multiple fields or every other contour strip into a single field for management.
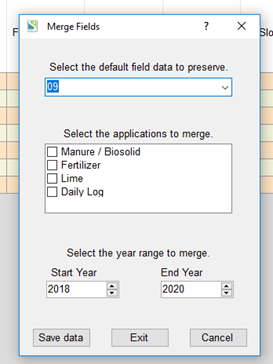
Because fields' crop and tillage history cannot be merged, you’ll need to pick one field’s cropping record you want to have as the default. Select the default data to preserve and the applications that you want to merge along with the years to merge. Then click Save Data. Please note that it is very difficult for us to merge daily log applications correctly, and in some cases this has caused problems. It is best not to merge the daily log. Rather, export your daily log application to an Excel file, decide what you want in your new merged field, and then re-import that daily log for the merged field.
SnapPlus merges the field geometry without using SnapMaps; however you should verify that the new merged boundaries are correct. Click on the SnapMaps tab. Now click Upload, then click Website. The fields that were merged should now show up as one. If the fields are not contiguous, only one part of the field will have a label.