Edit MRTN data for multiple field years |

|

|
|
Edit MRTN data for multiple field years |

|

|
|
|
||
If you have selected Edit MRTN data for fields in Step 1, then follow these steps to complete the task.
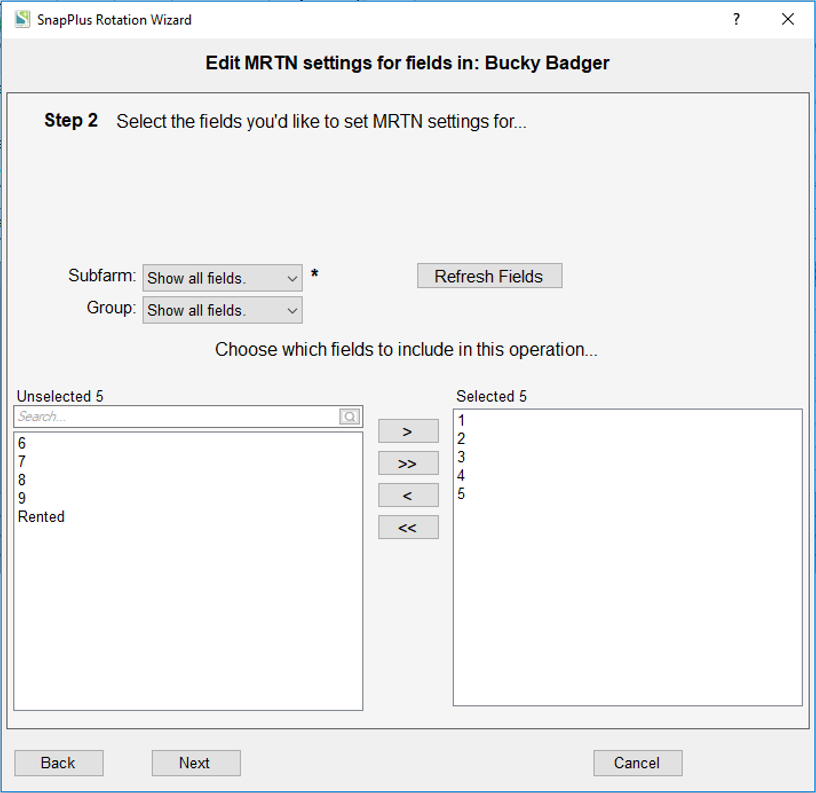
STEP 2: SELECT THE FIELDS YOU'D LIKE TO SET MRTN SETTINGS FOR

•Choose the fields to include in this operation by selecting field names in the left (unselected) pane of the dual select list and using the arrows to move them to the right (selected) pane. You can limit the fields shown by group or subfarm by using the dropdowns above the field selection area.
•Click the Next button to move to the next step.
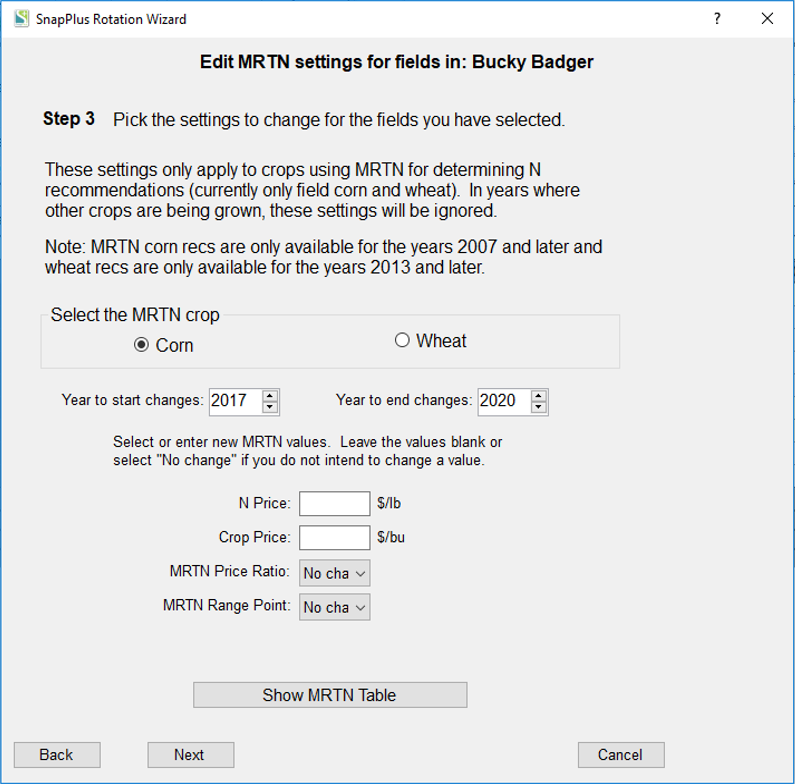
STEP 3: PICK THE SETTINGS TO CHANGE FOR THE FIELDS YOU HAVE SELECTED

Note that these settings only apply to crops using MRTN for determining N recommendations (currently only field corn and wheat). They are not relevant when other crops are being grown. See MRTN Information for an explanation of MRTN rates.
•Select the MRTN crop
•Select the Year to start changes and the Year to end changes.
•Enter the new value for N Price (optional).
•Enter the new value for Crop price (optional).
•Enter the new value for MRTN Price Ratio (If you have entered an N price and crop price, a value for the MRTN price ratio is calculated for you, but you can choose to override the calculated value.).
•Enter the new value for MRTN Range Point.
•Click the Show MRTN Table button if you would like to view the MRTN graphic, you can also view the tables in the MRTN Information section.
•Click the Next button to move to the next step.
STEP 4: CONFIRM SETUP
•Confirm setup: A last check on the list of fields to change before changes are made.
•SnapPlus Processing Error Message: After the changes are applied, SnapPlus recalculates the recommendations and other models with the new information. If there are problems running the models, then a dialog box will pop up with information about what went wrong. You can try to fix the individual problems, or, if you have made a snapshot, you can revert to the data you had before running the wizard.