Copy crop and application data to crop years |

|

|
|
Copy crop and application data to crop years |

|

|
|
|
||
Watch: The Rotation Wizard Part 5 - Making Multi-field Edits for a tutorial on copying crop and application data to crop years as well as other topics.
If you have selected Copy crop and application data to crop years in Step 1, then follow these steps to complete this task.
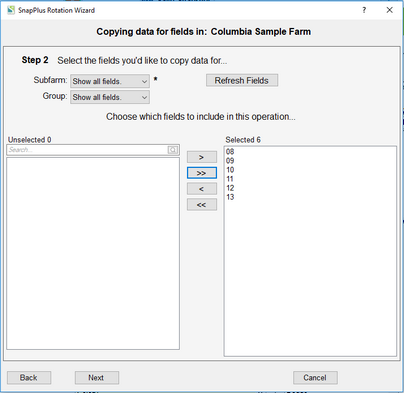
STEP 2: SELECT THE FIELDS FOR COPYING CROP YEARS

This selection allows you to copy a group of existing crop years to a future crop year for all of the fields selected. After selecting the fields for this operation, you'll come to Step 3 where you select the copy parameters.
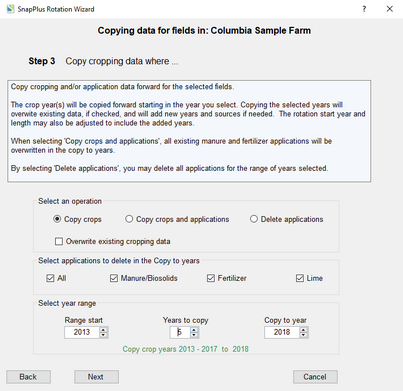
STEP 3: SELECT THE PARAMETERS FOR THE OPERATION

•Select an operation: Select whether you want to copy just the cropping data, the cropping data and the applications or delete applications.
oThe Delete applications option will allow you to delete applications in the year range selected.
oOverwrite existing cropping data applies if you are copying to existing crop years.
•Select applications to delete in the Copy to years: Select whether you want to delete specific applications in the Copy to years after the applications data is copied forward.
•Select applications to delete in the From years: This selection is only available if you selected the Delete applications option. Select whether you want to delete specific applications in the year range selected.
•Select year range: Range start is the year you want to start the copy or delete operation. Years to copy will determine the range of years. In the image above range start is 2013 and the years to copy is 5 so the operation crop years are 2013 to 2017.
oCopy crops will copy crop years 2013 thru 2017 forward to crop years 2018 to 2022.
oDelete applications will delete the application from crop years 2013 thru 2017.
•Click the Next button to move to the final step.
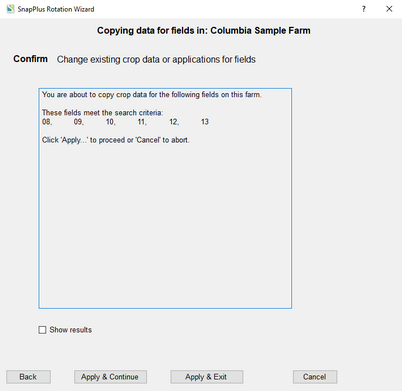
STEP 4: CONFIRM SETUP
•Confirm setup: A last check on the list of fields to change before changes are made.
•SnapPlus Processing Error Message: After the changes are applied, SnapPlus recalculates the recommendations and other models with the new information. If there are problems running the models, then a dialog box will pop up with information about what went wrong. You can try to fix the individual problems, or, if you have made a snapshot, you can revert to the data you had before running the wizard.
