Using the Farm Screen |

|

|
|
Using the Farm Screen |
|
|
Using the Farm Screen |
|
|
|
Using the Farm Screen |
|
|
|
|
||
Key Features of the Farm Screen
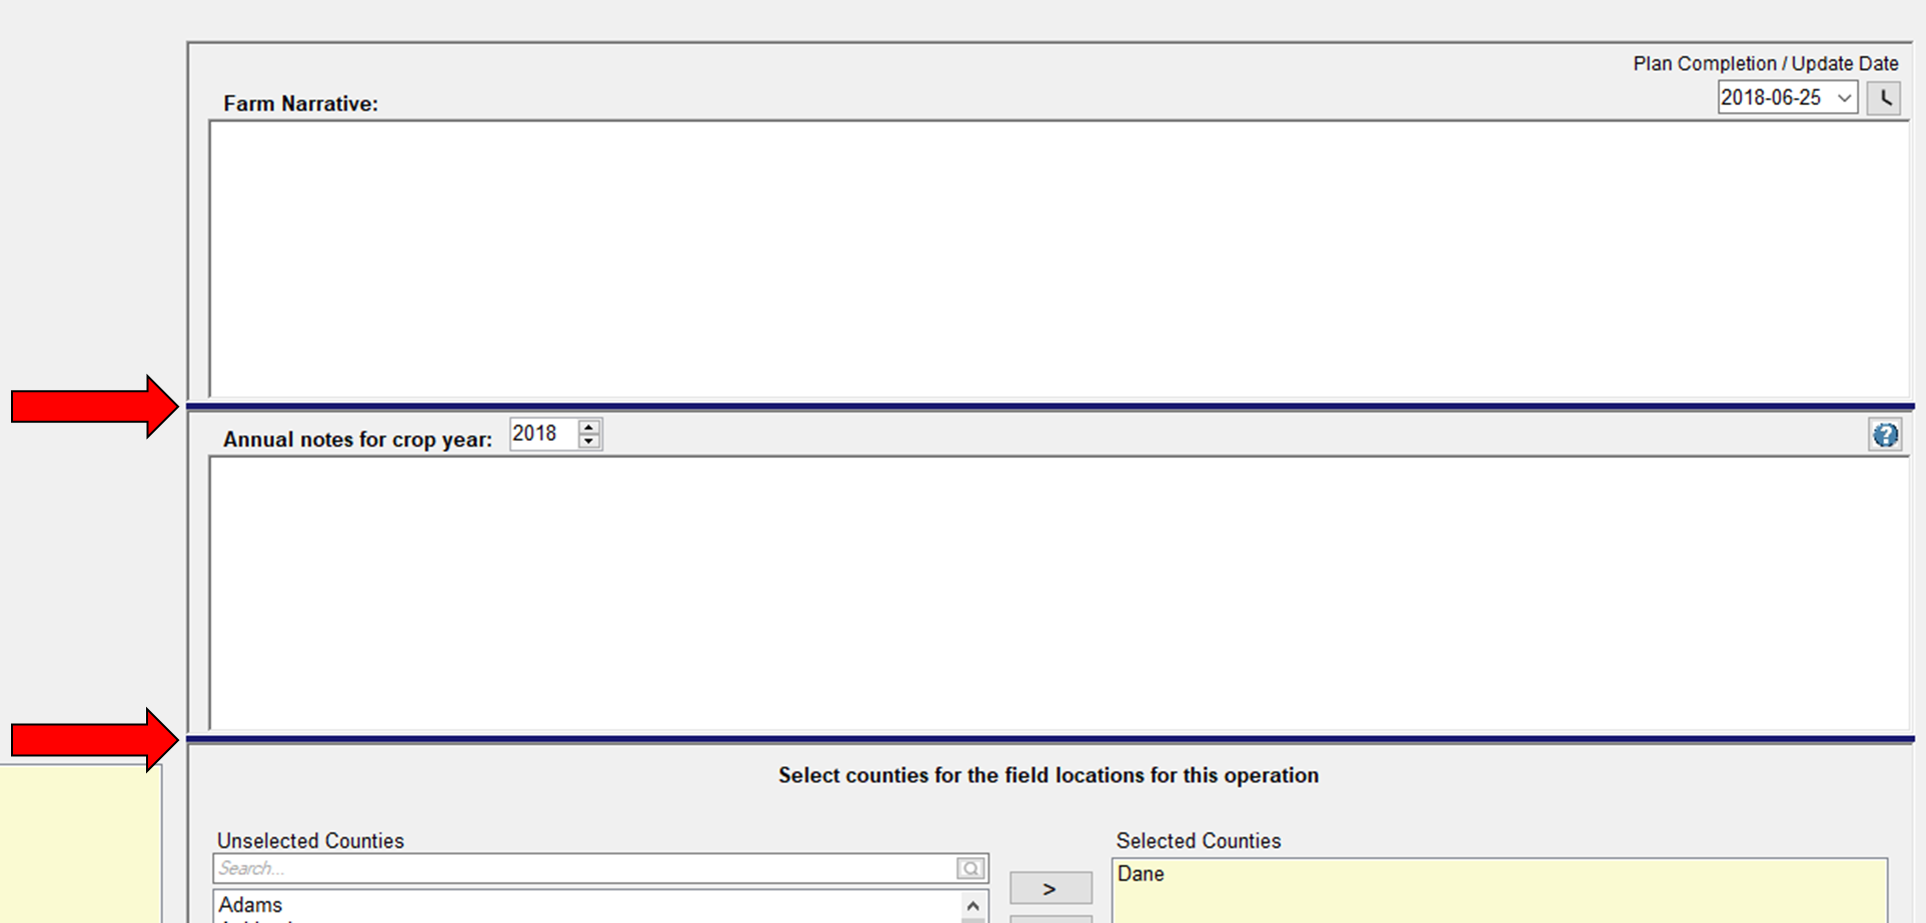
Farm Narrative: Explain the operations and practices on the farm, any unique circumstances, or to explain components of the plan. You can come back and add to or change whatever is typed in this box at any time. The Narrative box is not tied to any specific year. Any notes recorded here will show up on report NM1.
Annual Notes for Crop Year: Record notes about the cropping year. Any notes recorded here will show up on report NM1. For more information refer to A Note about Annual Notes for Crop Year
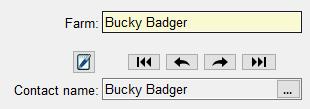
Contact name: You can directly enter the contact information by typing it in, or if you have other contacts to enter you can use the Contact Information tool above the contact name. This allows you to navigate through your contacts, consultants and preparers information using the navigation buttons. You may also use the edit button to go to the View Preparers dialog box found under the View menu.
Plan Completion/Update Date: Select the date when the plan is completed or updated. A calendar will appear if you click on the date. Today's date will fill-in if you click ![]() . This date will be on the reports.
. This date will be on the reports.
Manure Nutrient Credits: Check the appropriate manure nutrient crediting used for the farm. 2nd year credits are required for WPDES permits. To learn more about nutrient credits, see chapter 9 (page 78) of UWEX A2809 Nutrient application guidelines for fruit, vegetable, and fruit crops in Wisconsin.
WPDES Permitted Farm: Check this box if the farm is using a Wisconsin Pollution Discharge Elimination System permit. Note that SnapMaps spreadable acres calculations depend on this setting; if you change it after downloading and importing from SnapMaps, you should upload, download, and import again to get the new values.
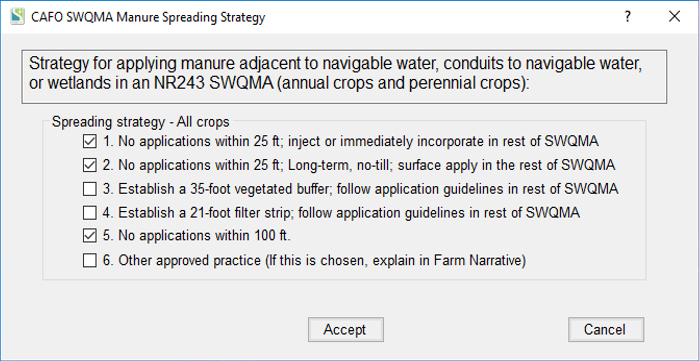
Select SWQMA Manure Application Strategies: This will appear if WPDES permitted farm is checked. This where planners indicate all of the strategies used on the farm for applying manure adjacent to navigable water, conduits to navigable water, or wetlands in an NR243 SWQMA. You will not be allowed to proceed to other screens until you have indicated at least one strategy.
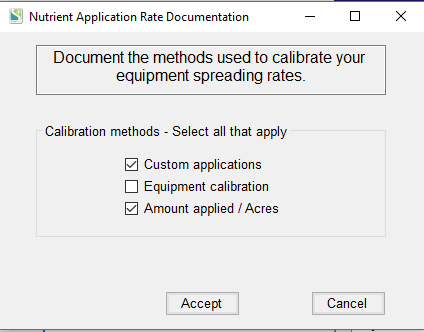
Document Spreader Calibration Methods: This allows you to document the calibration methods used for the entire farm.
Add Default Crops: Click on this box to add common alfalfa, corn and soybean crops to the selected crops list.
How to use the blue splitter bars: The blue splitter bars can be seen on the right of the screen between the Farm Narrative and Annual notes for crop year text entry boxes and just above the dual list box for selecting counties. Hover over the bar with your mouse and the cursor will change to represent resizing vertically stacked panels. Click and drag to move the bar and change the proportions between the text areas and County Selection boxes.
You can also view how-to videos at http://snapplus.wisc.edu/news-help/how-to-videos/
1.At the very top left hand corner of screen, left-click on File and select New SnapPlus farm. A dialog box will open allowing you to name the file and save it (the default location for most users is C:\SnapPlus2\MySnapPlusData\). The new farm will open and is ready to work on. The green stripe at the top of screen displays the Farm name and the location of the farm file.
2.Enter the information on the left side of the screen as completely as possible. The FSA code is optional.
3.If you are not a WPDES Permitted farm, select the manure nutrient credit check box that applies to the farm. To learn more about nutrient credits, see chapter 9 of UWEX A2809 Nutrient application guidelines for fruit, vegetable, and field crops in Wisconsin (see http://learningstore.uwex.edu/assets/pdfs/A2809.pdf).
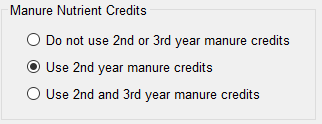
4. If you are planning a WPDES Permitted Farm (CAFO), then check the WPDES checkbox. The CAFO SWQMA Manure Spreading Strategy selection box will open. Also, the use of 2nd year Manure Credits is required for permitted farms, therefore the program automatically checks it. However, if a permitted farm wants to use 2nd and 3rd year credits, that is allowed too
5.CAFO SWQMA Manure Spreading Strategy: Select the appropriate strategy or strategies for the farm. Once your selection is complete, click on Accept. Note that SnapMaps is able to calculate the appropriate manure spreadable acres for SWQMA strategies 1, 2, and 5. If strategies 3, 4, and/or 6 are the only ones selected, spreadable acre calculations will assume a 100 ft no-application buffer is present in the field. The software will not allow CAFO planners to proceed to other screens without selecting SWQMA manure spreading strategies.
![]()
6.The Document spreader calibration methods button allows you to document the calibration methods used for the entire farm.
The 2015-590 NM Standard requires documentation for how nutrient rates are determined. The button will remain orange until at least one of your farm calibration methods is documented. ![]()
This 2015-590 Standard Checklist item 1. g. asks if one of these calibration methods has been documented.
7.In the Farm Narrative box explain the operations and practices on the farm, any unique circumstances or components of the plan. You can come back and add to or change whatever is typed in this box at any time. The Farm Narrative box is not tied to any specific year.
8.In the annual notes for crop year you are able to record notes separately for each year. Use the up and down arrows ( ![]() ) to change the year for your notes. This can be changed or updated at any time.
) to change the year for your notes. This can be changed or updated at any time.
9.Select crops planted on this farm. This is required for SnapPlus to run. Click to highlight a crop in the Unselected box and then click on the single arrow pointing to the right to move the highlighted crop to the Selected box. The double arrows move all crops to the Selected box. To remove a crop from the Selected box, click on it to highlight and then click the single arrow pointing left. The double arrows pointing left move all crops in the Selected box to the Unselected box. Using the same highlighting technique as for the crops, add any crops that might be grown on the farm. Click on Add Default Crops button to add the common crops of alfalfa, corn and soybean to the selected list. Crop definitions: SnapPlus crop choices are based on a crop year that generally runs from the day after the fall harvest to the next fall’s harvest, with some variation for crops that do not fit this schedule (for example, winter wheat harvested before fall). When two crops are planted or harvested in a single crop year, these crops are treated as “double crops” in SnapPlus. Both crops in a double crop system appear in the crop name. Examples of a double crop are: winter wheat followed by a late-summer seeding of alfalfa or red clover; canning peas followed by snap beans; and a first cutting of alfalfa hay followed by soybeans. Some crops are followed by “cover crops”. In SnapPlus, a cover crop is defined as not being harvested so the nutrients it contains are not removed from the field. If a small grain grown for winter cover will also be harvested for forage in the following spring, then select the appropriate double crop, such as “Winter rye (forage) to corn for grain” for the next crop year.
10.Select county(s) where the fields are located, using the same techniques as for crops above. This is required for SnapPlus to run.
11.Select the Plan Completion/Update date. Click on the today button (![]() ) if you are just getting started. When are you are finished with the plan, you can go back and set the date for when you submit the plan for review.
) if you are just getting started. When are you are finished with the plan, you can go back and set the date for when you submit the plan for review.
